TalkTools

TalkTools® — Header
Bite Tubes 101: TalkTools Bite Tubes for Jaw Stability
General

Bite Tubes 101: How TalkTools Bite Tubes Support Jaw Stability, Safer Chewing, and Speech Clarity

If you work with clients who chew on their tongue or clothing, show open-mouth posture, or fatigue during chewing — TalkTools Bite Tubes deliver the targeted TMJ input and graded jaw work they need. Here is everything SLPs need to know about the Bite Tube Hierarchy.

Key Takeaways
  • Bite tubes = dynamic jaw grading; bite blocks = isometric jaw stability. Use both based on your assessment findings.
  • The Bite Tube Hierarchy progresses: red → yellow → purple → green. Advance color-by-color once the client achieves at least two controlled compressions.
  • Bite tubes are exercise tools — not all-day sensory chewies. Use only as prescribed; provide alternative chew options for ongoing sensory needs.
  • TMJ-seeking behaviors (tongue chewing, pen biting, clothing chewing) often respond well to the Bite Tube Hierarchy, which targets the specific sensory input clients are seeking.
Quick Answer

TalkTools Bite Tubes are therapist-designed oral motor tools that provide targeted temporomandibular joint (TMJ) input and graded jaw movement. They are used to build jaw stability, safer chewing patterns, and speech co-articulation through a structured color-coded hierarchy: red, yellow, purple, and green. Bite tubes build dynamic jaw grading (movement); bite blocks build static jaw stability (holding). Most clinicians use both in an integrated program plan.

Bite Tubes vs. Bite Blocks: What Is the Difference?

Bite Tubes

Used for jaw grading — the smooth, controlled opening and closing of the jaw needed for chewing, mastication, and co-articulation in speech. Dynamic movement work.

Bite Blocks

Used for isometric resistance at specific, static jaw positions (positions 2–7). They build stability at each discrete jaw height. Static holding work.

In practice, many clinicians assess with both tools and choose the sequence based on clinical findings — including jaw instability (open-mouth posture), limited grading, sliding, or jutting. The right combination depends entirely on what you see during your evaluation.

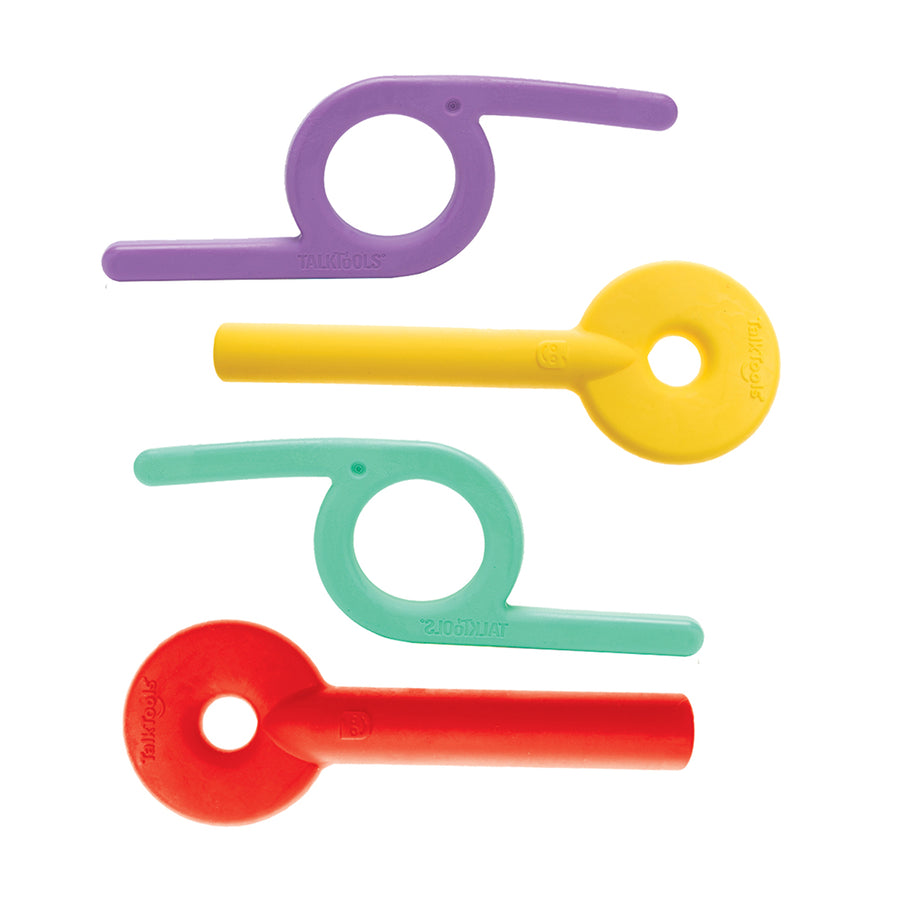
The TalkTools Bite Tube Color Hierarchy

TalkTools Bite Tubes follow a structured color-coded hierarchy that calibrates resistance level and provides clear, motivating progression for clients and caregivers.

Red — Starting Level
Lowest resistance. Begin here for most clients. Progress once the client achieves two strong, controlled compressions without compensatory movements.
Yellow — Level 2
Slightly increased resistance. Confirm bilateral symmetry and absence of jaw sliding before progressing.
Purple — Level 3
Moderate resistance. Session may include multiple colors based on fatigue level and clinical goals.
Green — Advanced
Highest resistance in the hierarchy. Reserved for clients with established jaw grading at earlier levels.
Progression rule: Once a client can achieve at least two solid compressions on a color without compensatory strategies, introduce the next level. Depending on fatigue, a session may include multiple colors in one set.

When Bite Tubes Are a Good Fit

  • TMJ stimulation for regulation: Tongue chewing, nail biting, or chewing on clothing often reflect a drive for TMJ input. Bite tubes meet that sensory need more directly than general chew tools.
  • Jaw grading for feeding: Bite tubes build the dynamic jaw control needed for safer, more efficient chewing patterns during mealtimes.
  • Jaw grading for speech: Improved jaw control supports co-articulation for clearer speech production.
  • Special populations: Clinicians report use across ages and diagnoses — including children with low tone, Down syndrome, and adults recovering from oral surgery procedures (such as trismus) where jaw mobility is a concern.

How to Introduce Bite Tubes (Therapist-Led)

  1. Start with assessment. Screen for jaw instability, sliding, and open-mouth posture; select bite blocks and/or bite tubes based on your findings.
  2. Choose the starting color. Begin where the client can achieve controlled compressions without compensations.
  3. Set dosage and home practice. Consistent home practice is key. Ensure the home plan matches your clinical judgment and the client's medical status.
  4. Monitor fatigue and form. Progress when compressions are strong and controlled; regress if you see compensations or fatigue.
  5. Document and communicate clearly. Share written instructions with caregivers so practice stays exercise-based, not recreational chewing.

Safety Notes and Common Pitfalls

Bite tubes are exercise tools — not all-day chewies. Use them only as directed in the program plan. For ongoing sensory needs between sessions, provide separate sensory chew options (e.g., nubby textures designed for sensory use), not the Bite Tube Hierarchy itself.

Additional safety considerations:

  • Do not skip the assessment. You will often pair bite tubes with bite blocks. The right order depends on clinical findings — not a single default sequence.
  • Cue symmetrical work. Address both left and right chewing sides to reduce sliding or jaw jutting.
  • Adjust color and reps to maintain good mechanics throughout the session.

Case Snapshots from Ask a Therapist

Down syndrome and tongue chewing: TMJ-seeking behaviors — such as pen chewing, shoelace chewing, or tongue chewing — can respond well to the Bite Tube Hierarchy, which provides the specific masseter activation and TMJ input those clients are seeking. It also builds the jaw stability and chewing skills that support speech clarity.

Adult trismus after oral surgery: When traditional jaw openers are not appropriate due to surgical changes, clinicians report success using a combination of bite blocks for static opening and bite tubes for dynamic mobility — paired with high-compliance home practice to increase jaw range and maintain opening gains.

Shop Bite Tubes
TalkTools® Bite Tube Set — complete 4-color hierarchy
TalkTools Bite Tube Set
All 4 ColorsTherapist-DesignedStructured Hierarchy
The complete color-coded Bite Tube Set for building dynamic jaw grading — red, yellow, purple, and green — for chewing, feeding, and speech co-articulation goals.
Shop Bite Tube Set
TalkTools® Jaw Grading Bite Blocks™ (Red)
Isometric StabilityPositions 2-7
Use alongside Bite Tubes for a complete jaw program. Bite Blocks build static stability at graded jaw heights; Bite Tubes build dynamic jaw movement. Together they address the full range of jaw function needs.
Shop Bite Blocks

Frequently Asked Questions

Bite Tube Hierarchy
Which bite tube color should I start with?
Start where the client can achieve controlled compressions without compensatory strategies. The Bite Tube Hierarchy typically progresses red, yellow, purple, then green. Advance color-by-color once the client achieves at least two strong compressions at each level.
What is the difference between bite tubes and bite blocks?
Bite tubes are used for dynamic jaw grading — the controlled opening and closing needed for chewing and co-articulation. Bite blocks are used for isometric resistance at specific static jaw positions (positions 2–7) to build stability. Many clinicians use both in an integrated plan.
Can bite tubes be used all day to stop clothing chewing?
No. Bite tubes are exercise tools, not all-day sensory chewies. Use them only as prescribed in the program plan. For ongoing sensory needs between sessions, provide separate chew options such as nubby textures designed for sensory use.
Can bite tubes and bite blocks be used in the same session?
Yes. Many clinicians assess with both and then deploy bite blocks for static stability and bite tubes for dynamic jaw grading within the same program plan. The right sequencing depends on what you observe during your evaluation.

Sources

Scroll to Top